Want to find out how to edit PHP INI in Synology NAS?
During the course of WordPress development, you may find that it is necessary to edit PHP INI file to increase Max_Input_Vars.
In one such scenario, if you are using the plugin ‘Table Rate Shipping for WooCommerce‘, you will need to increase the Max_Input_Vars in order to additional shipping rates to be created. If Max_Input_Vars remains at the default settings, you will find an error ‘Action Failed. Please refresh and try again’ whenever you try to create more shipping rates after hitting the higher limit.
The plugin developer had already provided some simple instructions on how to edit PHP INI settings at their support page. However, things may not be so straight forward, if you are developing from a Synology NAS and you do not have any experience with CLI (Command Line Interface) environment.
Here the 5 Minutes Step by Step Guide to learn how to edit PHP INI
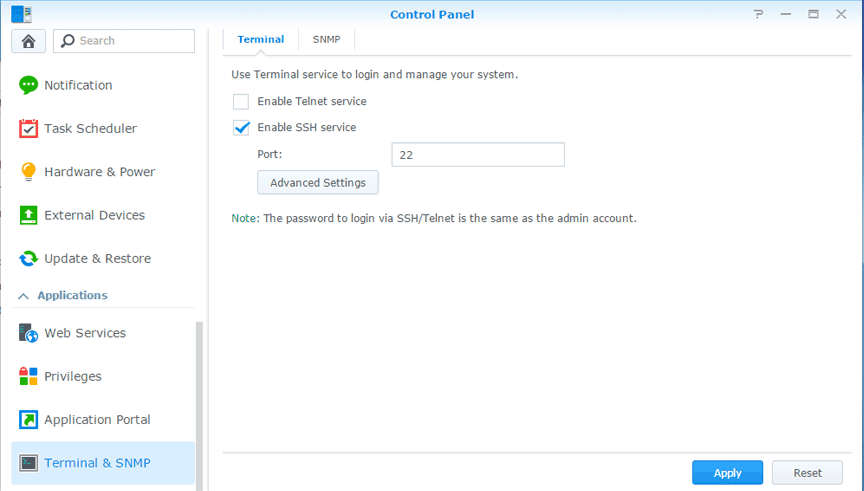
- First, enable the SSH Service through Synology Control Panel.

-
- Second, download a suitable SSH Client. Just google for it. Window-based users, you can download Putty.
- Open your SSH client and connect to your NAS, using the following settings:
- Host: Your NAS IP Address
- Port: 22
- UserID: root
- Password: Your Admin Password
- Once you have entered the Terminal Console, type in ” cd /etc/php ” (If you are using PHP7, you will need to navigate to /usr/local/etc/php70)

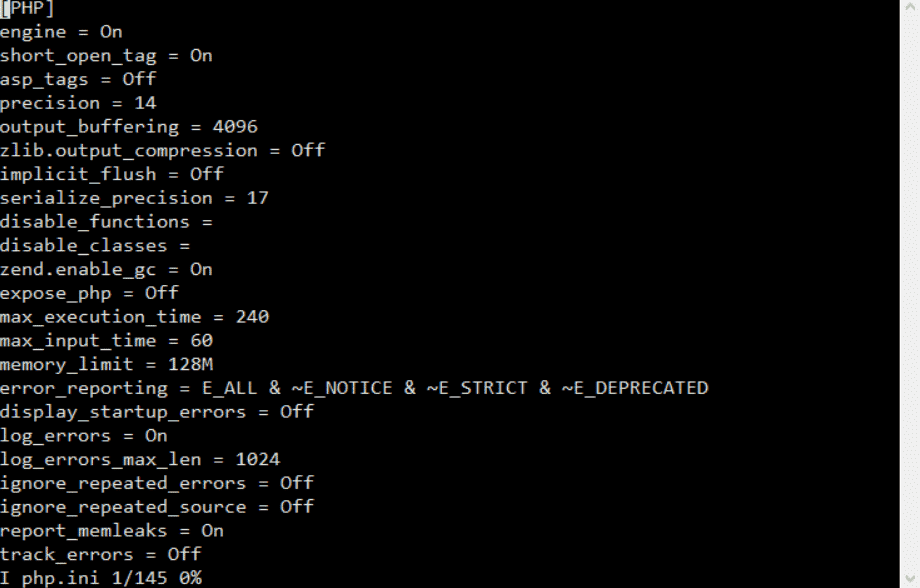
- Type ” vi php.ini” to edit the file (Refer to this link for deeper understanding)

- Press ” i ” to enter Insert Mode.
- Add in “max_input_vars = 5000” (You can enter any number more than 1000)
- Press ESC to exit Insert Mode.
- Type in “:x! ” to Save & Exit (If you faced Permission Denied problems, make sure you logged in using root, not admin.) You can type in sudo -i to enter root mode.
- Close the SSH Client and go to your Synology NAS’s administrative backend and restart the server.
- Once rebooted, login to your WordPress backend and make sure the PHPInfo plugin is reflecting the inserted value for max_input_vars.
- Why Keyword Stuffing Doesn’t Work Anymore and 2 Lessons That I Have Learnt - April 22, 2019
- How to find the best SEO company for you in 10 minutes? - February 11, 2019
- How We Become an SEO Specialist? - February 7, 2019


